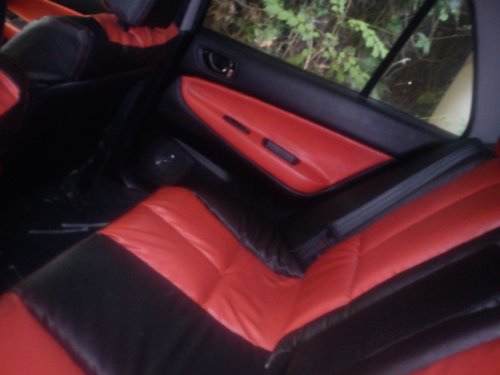
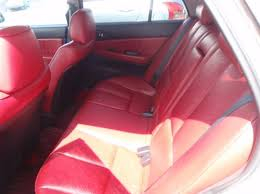
re-trimmed interior

rockit

Leaving Skid Marks
Location
SA
First Name
Robert
Drive
2000 Legnum
thought I'd put this up on here, shared it on the facebook group a week or so ago.

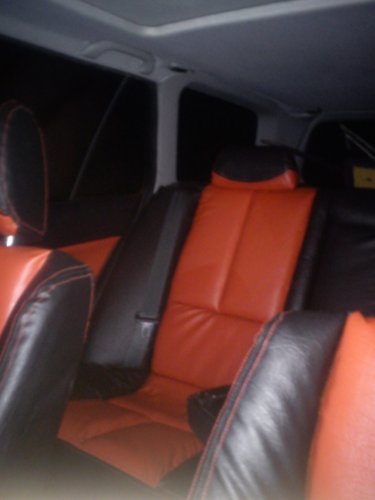
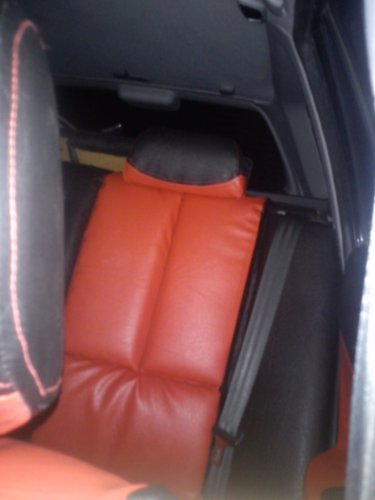
I have re-trimmed my cars interior. Its been done in red (which looks orange in some pics due to lighting, and that i'm using my phone camera!) and black artificial leather. Real stuff would have cost far too much as over 10 square meters of material was needed, so finding that much real leather of the same colour and textures would have cost a small fortune... I did it all myself by with an old hand-cranked sewing machine, so i could do it stitch-by-stitch and not risk stuffing anything up. There are a few spots that i'm not extremely happy with (like the drivers door card, which has started peeling, probably because I ran out of glue half way through sticking it down!).

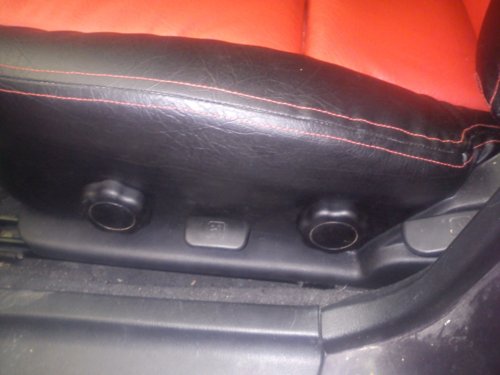
also while i was massacring my old seats I decided to give the passenger full adjust ability of their seat exactly like the driver has! just because i could :)

all up I've done:
all the door cards (drivers needs to be re-done when I get more glue!)
drivers seat
passenger seat
added drivers seat-style adjust ability to passenger seat
rear seats, including arm-rest in middle.
rear cushions either side of the seat (the bits the seat belt goes over)
all the headrests (quite possibly the hardest part of all to do!!)
the top cover of the center glove-box thingy
the steering wheel

all up it used:
about 13m^2 of leather (10 linear meters at 1.3m wide), probably a bit less than that but I cant work out exact amount as I didn't know how exactly how much was on the rolls to start with!!
about 3 tins of spray on contact adhesive
about 1-1.5 liters of contact adhesive (need slightly more, as I ran out of this on the last doorcard), and two tubes of foam/rubber glue.
2m^2 of thin foam and an unknown quantity (few m^2 probabbly) of upholstery wadding material to add a bit of cushioning into the seats and give it more of that standard leather puffiness

and here are some pics:

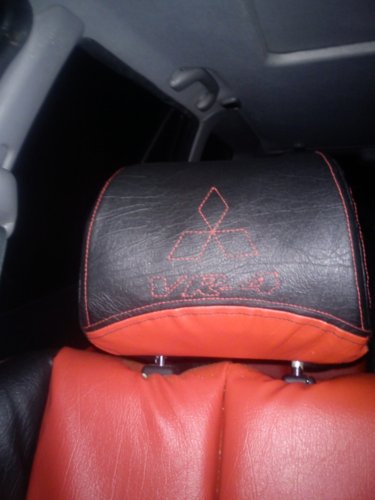
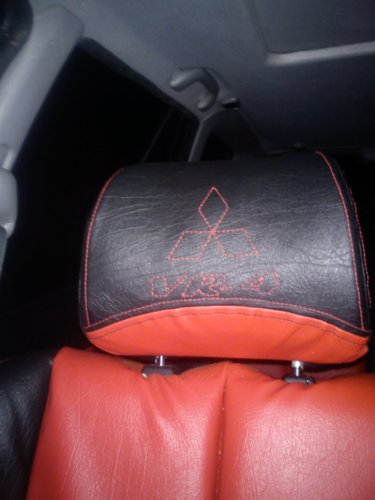
headrest: no its not the original headrest, they were a nightmare to work with and really didn't turn out looking all that good, so found some off a celica that looked better (IMO)
headrest.jpg

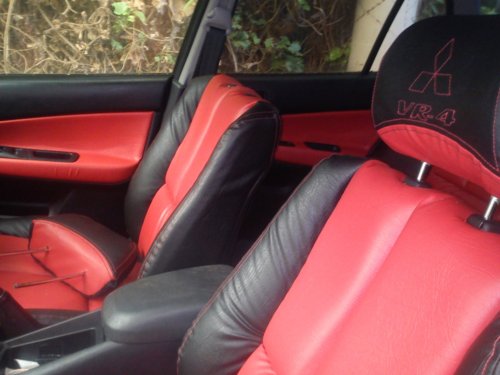
drivers&passenger seats (also center console is the normal one, took this pic before i had done that part!) the headrest is on the drivers seat is the standard mitsubishi one, really didn't look that good re-trimmed
IMG_20131013_130016.jpg

newly-retrimmed center console lid
IMG_20131027_213729.jpg

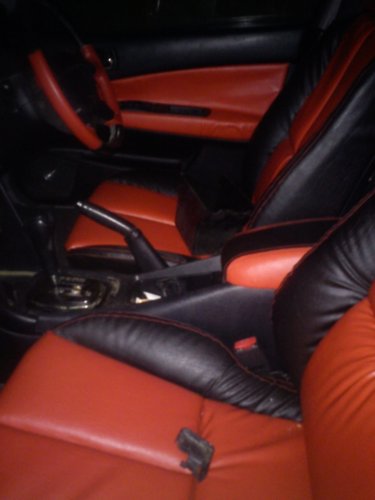
general pics of interior
IMG_20131027_213735.jpg

general pics of interior
IMG_20131027_213739.jpg

general pics of interior
IMG_20131027_213743.jpg

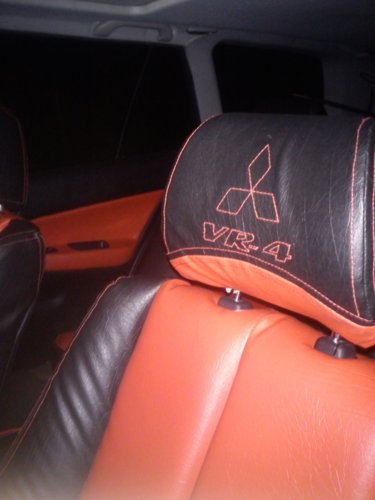
close up of drivers headrest re-worked with celica one
IMG_20131027_213819.jpg

passenger seats adjustment knobs
IMG_20131028_103951.jpg

rear seat
IMG_20131028_104149.jpg

fronts from behind
IMG_20131028_104153.jpg
 
G

Guest

Unregistered
Looks good mate, great job
If you don't mind my asking, what did it all cost you and where did you get everything?

Sent from the fires of Mt Doom
 

rockit

Leaving Skid Marks
Location
SA
First Name
Robert
Drive
2000 Legnum
the leather was about $11 per linear meter (1.37 wide) including shipping, imported directly from a manufacturer in china. I bought some end-of rolls/leftovers/scraps etc they had leftover from some huge order
for $216 i got about 10m of black 7m of red and 3m of green stuff (I have been roped into making seats for two of my younger brothers mini-restoration projects as well).


although after receiving it I notice it looks quite similar to stuff from various local stores like spotlight and clarke rubber, they both have stuff that looks almost identical in colour/texture but not sure about its backing/strength/UV resistance though (also theirs is $20 per meter normally), as the stuff I got supposed to be specifically for car/marine upholstery.


I used about 9m in total (give or take as i never knew how much was on the rolls to begin with, just that it was "about" 10,7 and 3m).


thread was $12 for 5km (it was cheaper for me to buy it by 5km spool than for a 500m spool!)- i estimate I used about 500m of black and maybe 200 of red, the thread is special outdoors upholsetery thread thats uv stabilized, its also VERY thick, thicker than most jeans visible stitching, I think its .25mm in diameter or thereabouts makes it nice and visible. it was probably the thickest thread that the machine I have could handle, and probably thicker than any modern domestic machine could.


glue was a bit hard to keep track of (as I'd tend to just run off to bunnings and get more whenever I ran out), all up I think I went through about 3 cans of contact adhesive spray and 2 500ml tins of the contact adhesive.
would estimate probably $75 of glue..


also $20 of thin upholsetery foam
and a $20 (i think) bag of polyester wadding stuff..


so probably close to $200 or 250 for materials for the set.. there were a few extra bits and peices in there, like a teflon foot for my machine, a few zips (fold down arm-rest in the back seat, and back headrests can be un-zippered and removed)
 
G

Guest

Unregistered
Did you pull apart a second set of seats to use as teplates and make covers for your seats?

Sent from the fires of Mt Doom
 

rockit

Leaving Skid Marks
Location
SA
First Name
Robert
Drive
2000 Legnum
yes and no:)

I stripped off the covers from the seats to use as templates (some were from a spare set, some were from the seats being retrimmed if i didn't have spares, like the legnum back folding bits) which is a painful job, seeing as mitsubishi likes to glue everything together with some good glue!

Because I added more depth to the seats (+1cm padding ontop, and deepened all the grooves by a fair bit to give it more of a depth effect) the templates weren't spot on and they basically gave me more of a rough template that had to be modified to account for the small differences..
 

niterida

Hesitantly Boosting
Location
WA
First Name
Ken
Drive
1997 Legnum

It looks like you have just single stitched these bits together, folded the material back along the stitch line and then stitched the red stitching. If so won't the single stitching just pull through the material ?
I am asking beacuse this is how I want one of my projects to look but wasn't sure how I was going to do it. I thought of doing it the way I described but am reluctant to do so in case it does fail :(
 

rockit

Leaving Skid Marks
Location
SA
First Name
Robert
Drive
2000 Legnum
It looks like you have just single stitched these bits together, folded the material back along the stitch line and then stitched the red stitching. If so won't the single stitching just pull through the material ?
I am asking beacuse this is how I want one of my projects to look but wasn't sure how I was going to do it. I thought od doing it the way I described but am reluctant to do so in case it does fail :(

correct that's exactly how i did it. I also added a piece of backing material between the two parallel red stitching lines for extra strength (that's the white you can see between them, i'm not sure why it has come out so clearly in the picture though in the car you can't notice it!!, in hindsight I should have used black fabric for that:))

from what I can see its the same way that seam is meant to be done (at least that's how its done on my leather sofa, and in the car upholstery book I read)


or another way to put it- mitsubishi just used a single stitch in that area without folding back over (as they weren't trying to be decorative) , so assuming similar strength fabrics it should be fine :)


if you are doing some area that is really highly stressed you could add another piece of material onto the backs of the fabric along the first single-stitch line, that should improve strength...

but in the end its all dependent on the strength of the material used, this leather stuff I'm using is very strong, if I do a single loop through it and grab the ends of the thread I cannot tear it through the fabric (the thread snaps before the fabric breaks, and the thread has a break force of 12kg or something) so im confident in this technique!
 

niterida

Hesitantly Boosting
Location
WA
First Name
Ken
Drive
1997 Legnum
correct that's exactly how i did it. I also added a piece of backing material between the two parallel red stitching lines for extra strength (that's the white you can see between them, i'm not sure why it has come out so clearly in the picture though in the car you can't notice it!!, in hindsight I should have used black fabric for that:))

from what I can see its the same way that seam is meant to be done (at least that's how its done on my leather sofa, and in the car upholstery book I read)


or another way to put it- mitsubishi just used a single stitch in that area without folding back over (as they weren't trying to be decorative) , so assuming similar strength fabrics it should be fine :)


if you are doing some area that is really highly stressed you could add another piece of material onto the backs of the fabric along the first single-stitch line, that should improve strength...

but in the end its all dependent on the strength of the material used, this leather stuff I'm using is very strong, if I do a single loop through it and grab the ends of the thread I cannot tear it through the fabric (the thread snaps before the fabric breaks, and the thread has a break force of 12kg or something) so im confident in this technique!

Thats how I thought of doing it too but then I thought it would make it too bulky along the stitch line - obviously not - thanks :)
 

king_panther

Gettin' tanked
Location
New South Wales
First Name
Brad
Drive
2012 VW Caddy 1.6TDI 7-Speed DSG. Still crappy DSG.....
Did you get your idea from the red Galant Super that was on sale a while back?
Interior looks nearly the same.
 

rockit

Leaving Skid Marks
Location
SA
First Name
Robert
Drive
2000 Legnum
Did you get your idea from the red Galant Super that was on sale a while back?
Interior looks nearly the same.
never saw that one.. just thought it would be a cool thing to do as i never really liked the stock interior..
 

TME_Steve

3 AYC Bars
Lifetime Member
Location
NSW
First Name
Steve
Drive
2010 nt did pajero tow car / 2000 6spd gc8 wrx tarmac rally car / 2000 Manual Subaru Outback 2.5 just a car
I did a car years ago (an old Datsun)it took forever so well done for the effort.
 
G

Guest

Unregistered
Why not just buy the D-Package leather interior if you wanted red Robert? Save you a lot if time lol..
 

rockit

Leaving Skid Marks
Location
SA
First Name
Robert
Drive
2000 Legnum
I've never heard of the d-package leather interior, and google isn't finding me any pics, just telling me that the d-package is a viento (which may be why I have no idea what it is, seeing as we only get VR4s here)... do you mean the black leather ones you are selling?

But anyway buying a set wouldn't be the same, this interior is now mine, nobody else has one the same and nobody else probably ever will :). When I look in my car now I see something that I have made and can be proud of, not just something that I threw some money at.

not trying to be rude, just trying to explain the way I think; I would rather spend days/weeks trying to do something myself and failing (preferably succeeding though) , learning something in the process ,than to just throw money at someone else to do it.
 
G

Guest

Unregistered
And hat off to you defiantly bud big task so big ups..
79da94e630759ad2000bc920f855a579_zps8902af05.jpg
 
Top Bottom