Looking for something that will replace the stock speakers

happymatch

Leaving Skid Marks
Location
nsw, Newington
First Name
jono
Drive
Maza Astina 323, Merc C Kompressor
It most certainly is. If the factory head unit has RCA outputs, then it will be pretty straight forward to wire up an amp.

Given the age of the Galant / Legnum, I'm guessing that the factory head unit does not have RCA outputs so you will need a line out converter in order to connect an amp.

Any half decent audio shop can do this install.

If you are getting an amp, make sure you get one that is rated at least 50 watts RMS not 50 watts peak power. The RMS rating is basically the power that it can provide all day, every day whereas the peak rating is only what it can produce for a fraction of the time and in limited operating circumstances.

As you are not using a sub, all you need is a 2 channel amp rated at least 50 watts rms per channel. It's pretty easy to get something decent for under $100.

When you are negotiating the purchase of the front splits, rear co-axials and amp, bargain hard! Get them to do a package deal for you or ask them to throw in the co-axials for free.

+1 for that

depending on how much you spend and research, you might find an amp with speaker level input - mine does, both 4ch and mono-. some brands like alpine used to have them, not sure they still do. If you can afford little bit more, make sure you buy the amp that can run plenty of power to it. if you under power the amp and raise the level, you might shorten the life of the speakers. two reasons. 1 there would be ac/dc frequency jumps and it will force speakers to move in funny ways. Second, id there are distortion, the sound frequency pattern would be much "rougher" and will caouse stress on your speakers, especially mid ranges and the subs. Remember dimi, i still have a sub to give away.
DO NOT get something too cheap~
Dimi, you might ask why some manufactureres put max out put as lke '2000 w" and all that but pretty cheap. I do not think there are any shop sells the amp which says peak of 50w... anyway, well, they are not really bulls*#ting. They sometimes shortens the pulse of the output. like "beeeeeeeeep" to "beep" and produce really high impacted output but lasts about a millisecond. RMS is more like continuose. so do not get confused.

I used Audiolines, Alpines, JVC, Kenwood so far and was happy with them all. Good luck with your shopping
 

James

Crunching Gears
Location
SA
First Name
James
Drive
1999 Facelift Peal Legnum VR4
Some good posts there, very helpful

So I'm guessing I should can the the 6 x 9's as they aren't worth the trouble fitting in, and go for 6.5inch splits...

I've always been a fan of Pioneer headunits and therefore mainly used their speakers, however i have always wanted to try DLS.
 

cyber_scriber

1 AYC Bar
Location
NSW
First Name
Bruce
Drive
2000 Galant; metallic dark blue; manual; Recaros; Momo steering wheel; and sunroof!
Some good posts there, very helpful

So I'm guessing I should can the the 6 x 9's as they aren't worth the trouble fitting in, and go for 6.5inch splits...

I've always been a fan of Pioneer headunits and therefore mainly used their speakers, however i have always wanted to try DLS.

James.

In my view, 6x9's are typically used as a band aid solution where there is no subwoofer in the system. Due to their cone surface area, they can play bass to some extent but of course, have nothing on a dedicated subwoofer. This is why I've never understood why some punters run both subs and 6x9's!

6x9's are generally inappropriate for the front stage and if this is what you intend to do, it's usually much more trouble then it's worth (you will need custom kick pods etc). In any event, a good quality component set will usually put a 6x9 to shame for front stage duties and will also be much easier to install.

I agree that Pioneer make some excellent bang for you buck head units. These days, you can get Pioneer head units with 3 RCA outs (with sub level control) and built in high and low pass filters for under $300 - can't argue with the value proposition there!
 

ygoslo

1 AYC Bar
Location
Victoria
First Name
Tim
Drive
91 Silvia, 97 Galant
Has anyone done an 8" sub in the parcel shelf of a Galant yet? I had one in my Celsior and thought it worked a treat.
 

steveP

1 AYC Bar
Location
SA
First Name
Steve
Drive
VR4 Galant
i was actually contemplating this the other weekend when i had my car in peices doing the rear splits. but it would require a lot of work, the metal will need to be trimmed, the carpet on the shelf all cut to fit, and theres all wires running under it u need to be carful with. and the shelf itself isnt that sterdy. i was able to drill thru it like wood, with my blunt drill pieces. and then u gota tune the sub as the boot will be its enclosure.

i came to the conclusion its not worth the effort to have a mere 8" sub. just go a 12 or 10, mdf box to suit. done. plenty of room in the boot. unlike s13's aye :p
 

ygoslo

1 AYC Bar
Location
Victoria
First Name
Tim
Drive
91 Silvia, 97 Galant
i was actually contemplating this the other weekend when i had my car in peices doing the rear splits. but it would require a lot of work, the metal will need to be trimmed, the carpet on the shelf all cut to fit, and theres all wires running under it u need to be carful with. and the shelf itself isnt that sterdy. i was able to drill thru it like wood, with my blunt drill pieces. and then u gota tune the sub as the boot will be its enclosure.

i came to the conclusion its not worth the effort to have a mere 8" sub. just go a 12 or 10, mdf box to suit. done. plenty of room in the boot. unlike s13's aye :p

Ah OK fair enough, I thought since there was a hole there already it could have been as simple as taking the blanking plate off and away you go. I've got a couple of 12 inch subs lying around but liked teh idea of the 8 inch because there's no seat in the way muffling the sound.

Don't talk to me about S13 stereos. I installed a head unit a while ago and obviously fuvled something up because the amps were running all the time and killing the battery. All 4 speakers were running off the amps but I figured for a quick fix I'd just pull out the power wires and then sort it out later. God knows how, but the speakers kept working after I did that. Now today I jumped in the car and whacked a CD in and nothing. So now I have the fun job of pulling it all apart and trying to work out what's happening. Luckily I can pull S13s apart in my sleep these days!

Now how off topic was that??? :ROFLMAO:
 

James

Crunching Gears
Location
SA
First Name
James
Drive
1999 Facelift Peal Legnum VR4
James.

In my view, 6x9's are typically used as a band aid solution where there is no subwoofer in the system. Due to their cone surface area, they can play bass to some extent but of course, have nothing on a dedicated subwoofer. This is why I've never understood why some punters run both subs and 6x9's!

6x9's are generally inappropriate for the front stage and if this is what you intend to do, it's usually much more trouble then it's worth (you will need custom kick pods etc). In any event, a good quality component set will usually put a 6x9 to shame for front stage duties and will also be much easier to install.

I agree that Pioneer make some excellent bang for you buck head units. These days, you can get Pioneer head units with 3 RCA outs (with sub level control) and built in high and low pass filters for under $300 - can't argue with the value proposition there!

Well I'm actually not going to be running a sub as I need the space, I have a baby and I DJ too. Thats why I thought the 6x9s, but if its gonna involve modifying the interior, i ain't going down that road..
 

cyber_scriber

1 AYC Bar
Location
NSW
First Name
Bruce
Drive
2000 Galant; metallic dark blue; manual; Recaros; Momo steering wheel; and sunroof!
James.

Fitting 6x9's in the front of a Galant / Legnum will not be a straight forward drop in and will require modification of the interior, most likely by way of custom kick pods. The front stage results will also probably be inferior to a decent component set.

For those who need the boot / wagon space, an easy option is a removable bass canon that is self amped. Takes bugger all space and can be taken out as and when you need to throw all the gear in the back.

The other (costlier and more complicated) alternative is a custom fibreglass enclosure in the boot that uses the spare wheel well as the enclosure. This of course, means that the spare has to be either carried in the boot or discarded altogether. Not a massive issue if you're using those small and skinny space saver tyres but potentially a problem if you have a full sized spare.
 

James

Crunching Gears
Location
SA
First Name
James
Drive
1999 Facelift Peal Legnum VR4
Yeah I will likely go for a decent set of 6.5" speakers. I don't have the time to do custom jobs.

Cheers for the info dude.
 

Buckas

Leaving Skid Marks
Location
WA
First Name
Dan
Drive
97 manual legnum
I just installed my alpine type s 6.5 splits in the front today. just needed new holes drilled in existing plastic mounting. I couldnt get the guard off the tweeters but they fitted underneath the tweeter cover panel using the stock mounting with them on anyway, pretty easy install. Haven't got my amp hooked up yet but when i used the system in my alfa i was always happy with them, dont cost too much either.
 

marksanne

Hesitantly Boosting
Location
Netherlands
First Name
Mark
Drive
1999 8G VR2 Galant & 1996 8G VR4 Galant
I found this tread looking for subwoofer solutions in Legnums, as I just swapped the original speakers in all doors for two sets of Hertz HKS165 components. For the front doors they are true components (the dismantled Hertz tweeters fit exactly in the orginal tweeter covers). In the rear doors I only put in the woofers from the component set.

I put in a whole lot of Dynamat Extreme dampening material. Although the sound has improved very very much, it doesn't sound exactly correct to me... Maybe I should add the Hertz crossover / splitter to the rears to get rid of the mids and highs to make it sound better, but I'm not sure that will be 'the' solution. That's why I thought "maybe add a subwoofer, let's see what the opposite part of the world dudes ideas/solutions are on that ;)

Now I didn't really find the answer in this topic, but I've seen links to other topics which I'll read in a bit. Yet I thought I'd share my experiences.

---

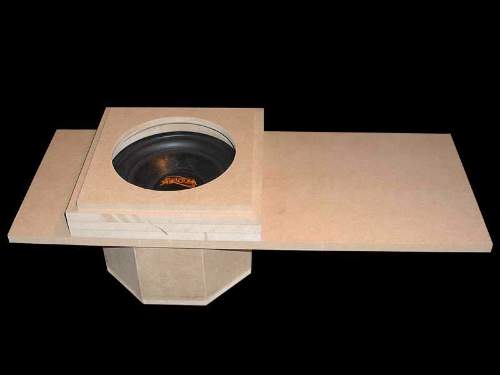
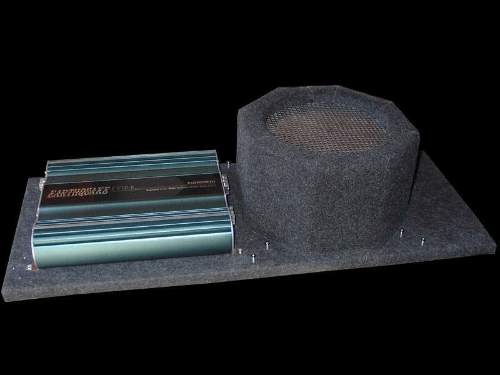
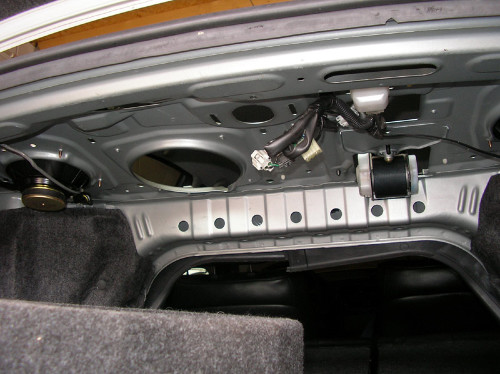
Besides the Legnum VR4 (RHD) I have a Galant "VR2" (LHD V6 with a VR4 engine in it, FWD only). In that car I have used (again) a set of Hertz HKS165 component speakers in the front doors (nothing in the rear doors as they don't have that option in the Galants), left the coaxial factory ones in the shelf and put in a specially designed a-periodic 10" sub mounted to the opening where a factory subwoofer could be installed. This sub is powered by a class J mono-amp from Earthquake, which needs to be almost turned down completely as everything will start to shake and rattle (not the sub! all kind of stuff in/on the car) when the gain is upped! Nevertheless it makes an incredible full deep sound inside the car. This type of subwoofer requires a very small enclosure and that's what I was aiming for: I don't want to lose too much space in the boot as I find that cars need to be practical, besides fast and good-looking ;)

In both cars I run the speakers by using a 2DIN Pioneer AVIC-HD1BT/AVIC-HD3BT (harddisk/sat-nav/MP3/radio/DVD/2-zone/CD/i-pod-connector/bluetooth carkit/reverse-gear-cam/etc/all-in-one headunit).

Some pictures:

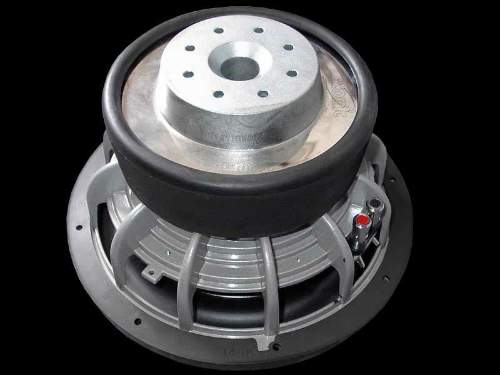
10" Atomic sub
sub05.jpg


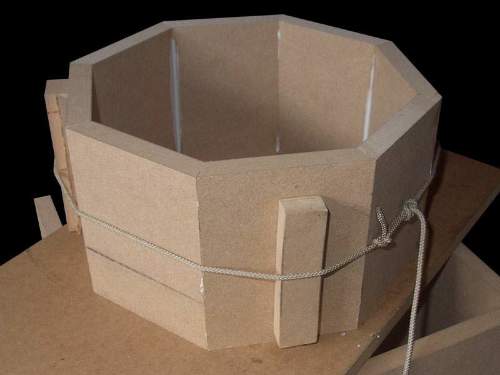
Enclosure
sub08.jpg


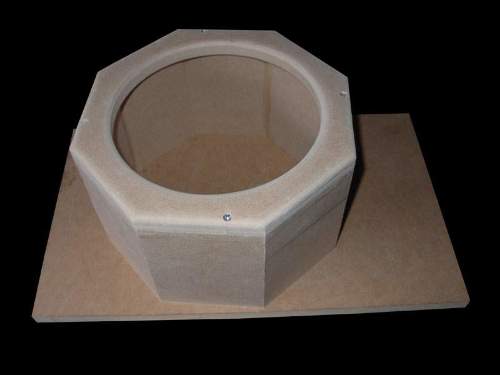
Enclosure
sub13.jpg


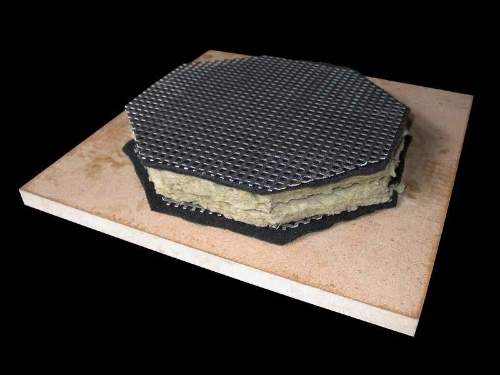
Semi-open membrane of the enclosure
sub21.jpg


Spacers on top and room for amp
sub27.jpg


Upholstered
sub30.jpg


Original shelf
8g-galant-audio02.jpg


Installed (using massive bolts as this whole thing is HEAVY!)
8g-galant-audio11.jpg


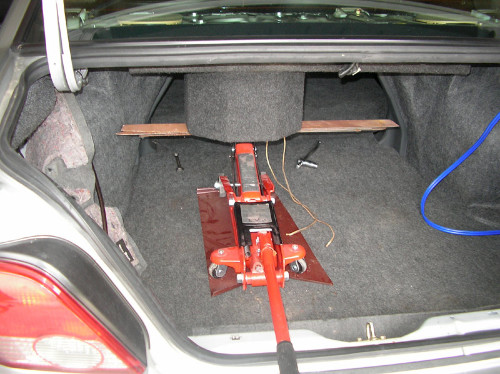
It's so heavy that I couldn't hold it long enough to be mounted, so we used a jack:
8g-galant-audio09.jpg
 

pu-11-me

and put an LSD in it
Location
NSW
First Name
Dawso
Drive
VW Touareg
Very clever. I'm impressed. :)

How does it sound compared to a conventional subwoofer setup?
 

cyber_scriber

1 AYC Bar
Location
NSW
First Name
Bruce
Drive
2000 Galant; metallic dark blue; manual; Recaros; Momo steering wheel; and sunroof!
Mark.

That's a very creative way of mounting a subwoofer enclosure. The bonus is that the spare tyre and jack are easy to access. Having more weight over the rear axle probably helps with weight distribution and balance too.

However, you have alluded to my concerns with that set up - "almost turned down completely as everything will start to shake and rattle."

Subwoofer enclosures need to be as stiff and rigid as possible, and mounted on a firm and stable surface. With all of that weight and bass resonating through the rear parcel tray, I imagine that there will be significant resonance and rattle through the tray, boot etc. Perhaps sound dynamat in the boot might help?

In respect of the rear speakers, ensure that they are filtered to cut out treble and bass, so as to avoid having your sound stage dragged back. Also make sure that your head unit is faded more in favour of your front splits.

It sounds to me that you're only a little tuning away from a sweet sounding system!
 

marksanne

Hesitantly Boosting
Location
Netherlands
First Name
Mark
Drive
1999 8G VR2 Galant & 1996 8G VR4 Galant
@pu-11-me: it sounds very (more?!) natural/neutral inside the car, like a well tuned subwoofer in a hifi-set in your living room, where the placing of a sub is hard to 'locate'.

However, if you're looking for impressing others with your setup with an open trunk, you'll be dissapointed. 90% of the sound volume gets into the interiour itself, instead of into the trunk, so nothing impressive happens there :) (I'm not into the impressing others outside my car with my stereo, I only want to enjoy it myself fully).

@cyber-scriber: the rear parcel tray itself is actually pretty stiff and firm, but the stuff that is laying on it (several mitsu cables) and hanging underneath it (more mitsu cabling and parts) are what's causes the rattling when the AMP gain is upped. As you suggested several pieces of dynamat and some better ways to tie/wrap the cables and it won't rattle. I just didn't have the time nor real need for it as it sounds very very good right now, even with the stereo crancked up at high volumes. (btw: when I say 'gain' I mean the gain on the -very powerfull- AMP).

The two orginal mitsu coaxials in the rear parcel tray receive full signal, but as most of the imaging is coming from the front (indeed faded mostly to the front) they serve only as a bit of fill. The subwoofer-output is adjusted seperatly from the coaxials and is adjusted to add a warm, deep bass. At these settings nothing rattles, no matter the volume.

Now all I need is to get something good and stealthy for the Legnum. But I've just read through some projects on here that are inspiring :) But I'm cocky (?), so I'll give those ideas my own twist and see what happens :)
 

Renz

Crunching Gears
Location
NSW
First Name
Lorenzo Bolanca
Drive
White 1997 Type S Legnum
Hey Dimi.

I'll 2nd the recommendation for MB Quart front splits. Over the last few years, I've gone through many a set of 6.5" splits (read blown up) but the MBQ's have handled everything I've thrown at them with aplomb. They actually output a very decent amount of mid-bass (you won't get sub-bass out of them) and as such, I would also 2nd the recommendation for Dynamat on the door panels. Simple 2 ways (or if on a real budget, coaxials) will suffice for the rear. Also, do yourself a favour, and buy at least a small 2 ch amp for the MBQ's (50-60w RMS) as the H/U will not do them justice. By all means, run the rears off the H/U, as they won't require much power to do their job.
 

steveP

1 AYC Bar
Location
SA
First Name
Steve
Drive
VR4 Galant
oh forgot about this thread. i actually got around to re-wiring the entire car when installing my amps/sub/battery terminals and mounting everything. ill do a proper write up with pics when i get home.
 

dimi_108

Leaving Skid Marks
Location
Strathfield, New South Wales
First Name
Dimi
Drive
NSX/Magna/M5
Cheers for the info and time spent with your replies, guys.

One of my rear speakers finally died the other day so as a temporary replacement, i went out and purchased a pair of JVC 6.5 no-frills speakers just for now.
They're about on par with the stock speakers, but these are just for now until I go out and get some proper ones (not even worth posting a picture of :ROFLMAO:).

I might have a look at getting those MBQ's. They sound alright, and you guys seem pretty sure about them.

Are they available off the shelf?

Mark, that's a very impressive install. I love it man :)
 

Renz

Crunching Gears
Location
NSW
First Name
Lorenzo Bolanca
Drive
White 1997 Type S Legnum
Dimi, I got my MBQ's from Lifestyle Audio in North Parramatta, but I'm sure they're available elsewhere. I think they are great bang for buck. Can't exactly remember how much I paid (2 yrs ago) I think around $300.
 

steveP

1 AYC Bar
Location
SA
First Name
Steve
Drive
VR4 Galant
ok some of this info may have been given by other members, but ill go thru my step by step stereo installation as some members may find it useful.

ill go thru:

1. re-wiring the factory speaker system and running amp cables from the engine bay to the boot.

2. installing the head unit.

3. front split installation.

4. rear speaker installation.

5. boot installation (amps, amp racks, sub box).


1.

Starting with the power cables for the amps, the biggest challenge is finding a route from the engine bay to the cabin. knowing (from previous articles on here) that there was no reachable grommet in the firewire, i had a go at running the wries thru the front left guard.

the front inner guard came off very easily, theres about 6 screws holding the guard in, and 4 on the bolt on guard.

once i had it off, i could either peirce a hole thru, where the factory loom ran, or remove the grommet in the pic. i poked a cable thru, feeing in at least 30cm and nothing came out the other side. i realised i need to feed it in thru the cabin, as it had to travel up around a corner to get to the grommet. it was a bit hit and miss, but eventually got it. the wire feeds into the firewall just above the kick panel. it was much easier to remove the glovebox to do this.

i then just cable tied everything to the factory wires, and it came out into the engine bay quite nicely next to the battery.

p0304091905.jpg


p030409190501.jpg


p030409190503.jpg


Then i simply connected some Jaycar digital terminals to the power cables, with the fuses neatly tucked into the guard.

The factory postivie (engine & accessories) and negative wires fit into the terminals fine. there wasnt heaps of length on these, so i cut the ends off as close as possible.

p1104091556.jpg


Once this was finished, i ran the power cables and the remote wire down the passenger side of the car. i had to remove the sil panels, which popped off quite easily with a long screw driver. i then removed the carpet around the seats and cable tied the wires along the factory wires up under the rear seats and into the boot under the carpet. i had to remove the rear seats for this. but its very easy, just 3 bolts. everything tucked under nicely and u wouldnt even be able to trace the wires if u were looking. everything clipped back on no probs when finished.

i did the same down the drives side of the car with the RCA/speaker cables. same sil panels came off and everything is run under the carpet. one thing i was careful of was, what looked like air bag triggers under the seat. the trickiest bit was running the cables under the drives foot well carpet, as it has that groove in it. however a bit of duck tape fixed holding everything in place until the carpet was all put back into place.


2.

this was actually one of the quickest and easiest part of the whole installation. firstly make sure u un-clip the surround around the gear stick, this pops off easily with a butter knife. then the main consol surround pops off in a similar way. but u MUST start front the top and work ur way down. theres a clip on each top corner, then another 2 half way down where the bend is, then finally the botton 2, which u cant pop out with a knife. remove the ash tray and pop it out with ur hand. then simply disconnect digital climate control and other wires going to the cigarette lighter.

NOTE: when putting everything back together, do everything in reverse. bottom first, then work ur way up to the top. i forgot this at first, couldnt figure out why nothing clipped in and nearly broke a clip.

then with the actual wiring of the head unit. every head unit will be slightly different. but just cut the existing loom and solder to the new loom. i had a dvd player which needed to be hooked up to the hand brake to watch movies. i then discovered that hand brake wire is simply a earthing wire ;)
i had to fiddle around to get my head unit mounting right. but again, this will depend on the head unit.

i made sure i hooked up all the rca cables up correctly. and maked them which was front/rear. so when i got to the boot, i didnt have to remove the head unit again to check.

i was also able to get a DIN pocket for $5 which is actually really handy. it simply clipped in with new screws.

p1404091726.jpg


3.

i had previously playing around with the front splits, cutting the tweeter wire, and running the crossover off the woofer cable. i didnt like the idea of not knowing where these wires split, or what affect the cut tweeter wire would have, so i clipped all the wires.

from the amp cable installation earlier, i had planned ahead and run new speaker wire from the boot to the the front of the car. this wire was run down the drivers side with the rca. away from any power cables that can cause interference.
luckily i had plenty of time before the installation to plan everything. which defiantly made everything run smoothly.

anyway above the kick panel, near where the amp cables came in thru the wheel guard, there was factory wires running thru to the door. i tied the speaker cable to a bit of wire and worked it thru into the door. i had to puncture the sleave within the door to get it thru. once thru, theres plenty of grommets to wire up the crossover and tweeter/woofer. basically this should be easy as, with putting the door trim back on.


4.

the rear installation was much easier with wiring up, as the crossovers were in the boot. but i had a bit of trouble mounting the tweeter. this is the location i decided on, with the main aim to keep things looking subtle.

p1205091734.jpg


5.

so now i was left with an empty boot full of random wires and nothing even turned on yet to test if my work hasnt been in vain. this was day 3 of the installation.

p050409130101.jpg


p0504091301.jpg


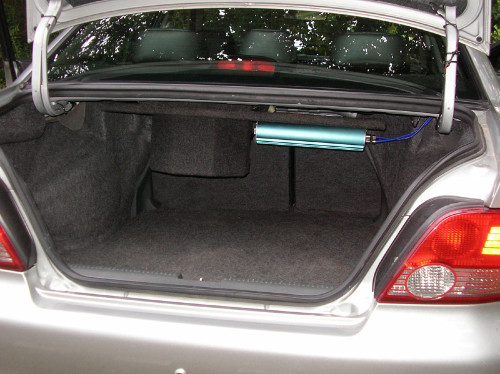
i looked around for a while how to mount the amps, with the main goal, as well as being neat, is to have access to the spare tyre. i decided on one either side of the boot where theres just random grooves in the boot carpet. so down i went to bunnings with my measurements. got them to cut me some 1/2" mdf and some black carpet. i then nailed it all together and added some L brackets for mounting to the car.

i then made sure everything was wired up correctly before actually mounting the amps. the earth cables was bolted to the body of the car after sanding off the paint (under the carpet) and all the other wires fell into place.

i mounted the sub box in a similar way i did in my silvia, with limited boot space. got a strap from autobarn which has slight give in it. bolted it to the body of the car, and its rock solid.

clipped all the carpet back in, mounted the amps. and ended up with this..

p0604090819.jpg


p060409081902.jpg


turned on the ignition and everything powered up and worked like a charm.. phewwww!

spent a good few hours playing around with the low/high pass filters, levels, sub sonic filters, etc. but system sounds awesome, nice and clear, tight mid bass and not over powered by bass.

still got plenty of boot space, and the amps are tucked away, so not worried about damaging them. the spare tyre is accessible too by simply un-clipping the strap. and lastly, i didnt have to add heaps of weight to the car.
 
Top Bottom